A real estate video tour isn't just a slideshow. It's a marketing powerhouse that breathes life into your static listing photos, turning them into a video walkthrough that actually tells a story. It gives potential buyers a genuine feel for the property's layout and flow, helping your listings cut through the noise and land more serious inquiries.
Why Photo-Based Video Tours Are an Agent's Best Friend
In a market this crowded, you have to find ways to stand out. Full-blown professional videography is fantastic, but let's be honest—it's not always practical. Between the scheduling, the budget, and the time it takes to shoot on-site, it's a big commitment. This is where creating a video tour from your existing listing photos becomes a total game-changer.
Think of it as a clever workaround that delivers massive results without the logistical nightmare. You already have the most important asset: beautiful, professional photographs. By layering in some simple motion, music, and key details, you can transform a standard photo gallery into an immersive experience that grabs and holds attention way better than static images ever could.
Save Time and Reduce Costs
The biggest and most immediate win here is pure efficiency. You don't need to book a videographer, pray for a sunny day, or ask the sellers to leave their home for yet another appointment. You can spin up a compelling video in minutes—not days—using the photos you’ve already invested in.
This frees up your time and marketing budget, making it possible to use this powerful strategy for every single listing, not just your luxury properties. You can move at the speed of the market, getting a dynamic video online almost as soon as the photos are back from the photographer.
Boost Engagement and Attract Qualified Leads
It’s no secret that video crushes static images on social media and listing portals. A well-made video tour keeps a buyer’s eyes on your listing longer, giving them a chance to build an emotional connection before they even step through the door. It helps them piece together the floor plan, imagining how the living room flows into the kitchen or how the backyard feels from the main living space.
By giving potential buyers a more detailed preview right from the start, you attract people who are genuinely interested and already informed. This naturally filters your leads, so the people who do reach out are far more serious, saving you from wasting time on dead-end showings.
The numbers don't lie. Virtual tours have gone from a "nice-to-have" feature to a "must-have" expectation. Listings that include a virtual tour get a staggering 87% more views than those without one. Even more telling, 54% of buyers now say they won't even bother looking at a property if it doesn't have a virtual tour first. You can dig into more of these trends over at Agentup.com.
At the end of the day, this approach simply gives modern buyers what they want: a convenient, engaging, and informative first look at their potential new home.
Mapping Out Your Property's Story
A great video tour is more than just a slideshow of pretty pictures. It tells a story. It has a narrative that pulls people in and makes them feel like they're walking through the home themselves. Before you touch any software, you need a plan. This little bit of prep work is what separates a forgettable clip from a marketing powerhouse that actually gets your phone to ring.
Think about how you'd give an in-person tour. You wouldn't just randomly jump from the kitchen to an upstairs bedroom, right? You’d guide a buyer through the space logically. Your video needs to do the same thing to create a journey that makes sense and helps viewers truly understand the property's layout.
Crafting a Logical Shot Sequence
Your tour should almost always start from the outside. That first curb appeal shot is your hook. It sets the tone for everything else. Kick things off with the absolute best photo of the front of the house to create a warm, inviting welcome.
Once you’ve set the stage, bring the viewer inside, just like you would at an open house:
- The Entryway: Move from the front exterior right into the foyer. This is a natural transition that helps establish that welcoming vibe.
- Main Living Areas: From the entryway, flow into the heart of the home—the living room, dining room, and kitchen. Keep these shots together to show how the main living spaces connect.
- Bedrooms and Bathrooms: Next, head to the more private areas. I always recommend starting with the primary suite, then moving on to the other bedrooms and bathrooms.
- Outdoor and Special Features: End the tour with a bang. Show off the backyard, the deck, or any unique features like a home office or a great view. You want to leave a strong, lasting impression.
Selecting Your "Hero" Shots
Here's a pro tip: you don't need to use every single photo from the shoot. In fact, you shouldn't. Be ruthless and pick only the "hero" shots that move the story forward. For each room, choose just one or two images that really capture its best light, key features, and overall feel.
Always remember, quality over quantity. A video that feels cluttered or repetitive will have people swiping away in seconds.
Your video's power comes from a carefully curated story. You have to think like a movie director. Every photo is a scene, and each scene needs to advance the plot and show why this home is the one. You're not just showing rooms; you're selling a lifestyle.
If you want to get better at spotting what makes a photo truly pop, check out our guide on essential real estate photography tips for some advice you can put to use right away.
This is where a tool like AgentPulse can really make a difference. It lets you visually map out your sequence, so building that logical flow becomes second nature.
Having a simple drag-and-drop editor lets you focus on the creative side of things—crafting the most compelling story for your potential buyers—instead of getting bogged down in complicated software.
Bringing Your Video Tour to Life
You've got the story and the photos ready to go. Now for the fun part: actually building your real estate video tour. This is where we turn a simple collection of still images into a dynamic walkthrough that really grabs a buyer's attention. You don’t need a Hollywood budget, either—just the right approach and a few simple tools.
Choosing Your Editing Software
First things first, you need to pick your video editing software. If you want something quick, easy, and mobile-friendly, apps like CapCut or InShot are fantastic. They’re super intuitive and you can get a great-looking video done in no time.
For agents who want more granular control, professional-grade software like DaVinci Resolve or Adobe Premiere Pro offers endless possibilities, but be prepared for a steeper learning curve.
Of course, for a tool built from the ground up for real estate, something like AgentPulse is a game-changer. It’s designed to do the heavy lifting for you. You just upload your photos, and its AI creates those smooth, cinematic camera movements automatically, saving you hours of tedious work. We break down even more options in our complete guide to video editing for real estate agents.
This simple workflow shows how the story you've planned directly informs which photos and music you'll use.
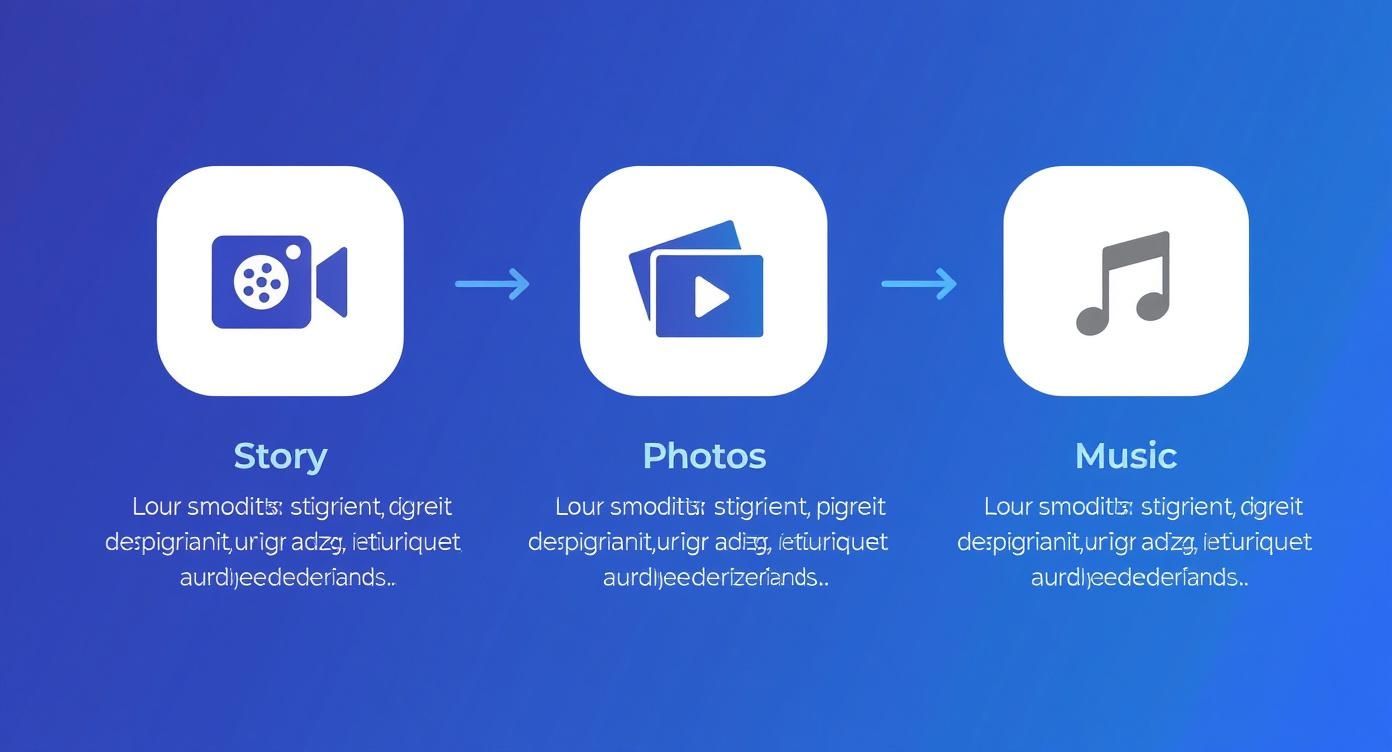
Following this path ensures your final video feels connected and tells a coherent story from start to finish.
Making Static Photos Feel Dynamic
The secret to a compelling photo-based video is creating motion that feels natural and deliberate. Forget about those cheesy, jarring transitions you’d see in an old family slideshow. The goal here is subtlety.
The Ken Burns effect is your best friend. It’s a classic technique that involves slowly panning across an image while subtly zooming in or out. Imagine you have a great shot of a spacious living room. You could start wide and then slowly zoom in toward the fireplace, drawing the viewer’s eye to a key selling point. It creates a sense of depth and guides their focus.
The goal is to make viewers forget they’re looking at still photos. The movement should feel so natural it’s like they are in the room, slowly turning their head to take it all in. That’s what makes a space feel tangible and real.
Mastering Aspect Ratios for Every Platform
One size definitely does not fit all in the world of social media video. To look polished and professional, your video tour must be formatted correctly for the platform where you’re posting it. A horizontal video squished into a vertical frame on Instagram Reels is a dead giveaway of an amateur, and it’s a mistake I see all the time.
Here's a quick cheat sheet for the most common formats:
- 16:9 (Horizontal): This is your standard widescreen format. It’s perfect for YouTube, your website, and most MLS platforms. Use this to show off those beautiful wide-angle exterior shots and open-concept living areas.
- 1:1 (Square): A great, versatile option for your main Instagram and Facebook feeds. It looks good on both mobile and desktop, striking a nice balance between the other two formats.
- 9:16 (Vertical): This is non-negotiable for Instagram Stories, Reels, TikTok, and YouTube Shorts. It fills the entire phone screen, creating an immersive experience that keeps people watching longer.
Taking the extra minute to export your video for each specific format makes a huge difference in how your brand is perceived. And the results speak for themselves: listings with video get an astounding 403% more inquiries than listings with just photos. As detailed by real estate marketing experts at First Team, buyers have come to expect this richer, more engaging way of viewing a property online.
Optimal Video Settings for Social Media Platforms
To make things even easier, here's a quick reference table for the best video export settings. Getting these right ensures your video looks crisp and professional wherever you share it.
| Platform | Recommended Aspect Ratio | Recommended Resolution | Optimal Length |
|---|---|---|---|
| YouTube | 16:9 (Horizontal) | 1080p or 4K | 2-5 minutes |
| Instagram Feed/Facebook | 1:1 (Square) or 4:5 (Vertical) | 1080x1080px or 1080x1350px | Under 60 seconds |
| Instagram Reels/TikTok | 9:16 (Vertical) | 1080x1920px | 15-60 seconds |
| MLS & Website | 16:9 (Horizontal) | 1080p | 1-3 minutes |
Using this guide will help you avoid blurry, poorly cropped videos and ensure your property tours look fantastic on every device. A few extra clicks during export can make all the difference.
Adding That Professional Polish with Sound and Text

The difference between a good video tour and a great one often boils down to the final touches. Your visuals are locked in, the pacing feels right, and now it’s time to add two elements that truly elevate the experience: sound and text. These details work together to build an emotional connection with buyers while delivering key information without them even realizing it.
Think of music as the emotional heartbeat of your video. The right track can instantly make a sleek downtown condo feel energetic and chic, or a sprawling suburban home feel warm and inviting. Get it wrong, though, and it's a major distraction.
Choosing the Perfect Soundtrack
Your goal is to find a piece of music that complements the property's style without ever overpowering the visuals. From my experience, a light, airy instrumental track is almost always a safe and effective bet. It creates a pleasant atmosphere that lets the home itself remain the star of the show.
Here are a few things I always keep in mind when picking a track:
- Match the Vibe: A luxury estate calls for something more elegant and classical. A trendy, industrial loft? That might work better with an upbeat, modern tune. Let the house dictate the sound.
- Keep it Instrumental: Vocals are incredibly distracting. They pull focus away from the property and can feel really dated. Stick with instrumental music to keep the home front and center.
- Use Royalty-Free Sources: Never, ever just pull a popular song you like off the internet. To avoid nasty copyright strikes, use a platform like Epidemic Sound, Artlist, or even the free library built into your editing software.
Once you’ve found the perfect track, be sure to set the volume low. It should feel like background ambiance, not the main event. A good rule of thumb is to keep your audio level somewhere between -12dB and -18dB.
Music is the silent narrator of your video. It guides the viewer's emotions and helps them envision a lifestyle, not just see a collection of rooms. The right track makes a space feel like a home.
Using Text Overlays to Highlight Features
While music sets the mood, text overlays deliver the facts. This is absolutely critical, because a huge number of people watch videos on social media with the sound off. On-screen text is your only way to communicate key information to them. The trick is to be concise and strategic—less is always more here.
You aren't trying to write a novel on the screen. Instead, use short, punchy text to call attention to high-value features that a photo might not fully capture on its own.
Here are a few examples of text overlays that work really well:
- Highlighting Upgrades: "Brand New Quartz Countertops"
- Calling Out Space: "Spacious Walk-In Closet"
- Showcasing Outdoor Areas: "Private, Fenced-In Backyard"
- Noting Key Details: "New Roof (2023)"
I usually place the text in a clean, unobtrusive spot, like the lower third of the screen. Always use a simple, readable font and make sure it has enough contrast to pop against the image behind it.
By pairing tasteful music with clear, informative text, you create a polished video that engages viewers, whether they have their sound on or off.
Sharing Your Video to Attract Buyers
You've planned, created, and edited a killer video tour. Now for the fun part: getting it in front of the right buyers. A fantastic video doesn't do much good if nobody sees it, so you need a smart plan to get it out there.
Before you start uploading, let’s talk about export settings. This is a small step that makes a huge difference. Always export your video in 1080p (1920x1080 resolution). It’s the perfect balance—crisp and clear on any screen, from a phone to a big-screen TV, but not so massive that it takes forever to load. This one file will be your go-to for everything that follows.
Your Multi-Channel Promotion Plan
Don't just stick your video in one place and cross your fingers. To get maximum eyeballs and generate real leads, you need to share it across several key platforms. Think of it as a coordinated campaign.
- MLS Listing: This is your top priority. Get that video uploaded to the MLS right away. It's the first place serious buyers and their agents are looking, and your tour will make your listing instantly stand out from the sea of static photos.
- Your Website: Make the video the star of the property's landing page. When you embed a video, people stick around longer, which sends a great signal to Google and can help your site rank better.
- YouTube: If you don't have a YouTube channel for your business, now's the time to start one. Uploading your tour there lets you write a detailed, keyword-packed description and link directly back to the listing on your website. It’s a great way to build your online footprint.
- Social Media: This is where you create the initial buzz. Share it everywhere—a Facebook post, an Instagram Reel, and even a Story. You never know which platform will catch fire and bring you the right buyer.
For those higher-end or unique properties, stepping up your video game can really pay off. Drone footage, for instance, has become almost essential for showcasing sprawling estates or properties with beautiful surroundings. It’s not just for show, either; properties marketed with drone video sell an average of 68% faster. You can dig into more video statistics shaping the market on PhotoUp.net to see the impact.
Your video's thumbnail is its digital curb appeal. It’s the very first thing people see and what convinces them to click 'play'. Always choose a bright, compelling shot—usually the front exterior or the stunning kitchen—to make an irresistible first impression.
Writing Headlines That Drive Clicks
The title of your video and the text you post with it are just as crucial as the visuals. On social media, you have about three seconds to stop someone’s scroll. You need a hook.
Forget the boring "123 Main Street For Sale." Try something that sparks a little curiosity or emotion:
- "Your Dream Backyard Awaits at 123 Main Street!"
- "Step Inside This Beautifully Remodeled Kitchen in Anytown."
- "Just Listed: A Perfect Family Home with a Pool!"
See the difference? You’re not just making an announcement; you're extending an invitation.
If you’re looking for more ways to make your content pop, we’ve got a ton of ideas in our post about finding the best real estate video app. When you pair a polished video with a thoughtful distribution strategy, you're not just marketing a property—you're creating an asset that works for you 24/7.
Your Top Questions Answered
Jumping into video for the first time? It's natural to have a few questions. I've heard them all from agents over the years, so let's clear up the most common ones and get you ready to hit 'record' (or, in this case, 'create').
Do I really need professional photos?
Yes, 100%. This whole process is built on the foundation of great photography. You can't turn blurry, poorly-lit, or crooked photos into a beautiful video. In fact, adding motion and transitions will only magnify those issues.
Think of it this way: your photos are the ingredients. If you start with high-quality ingredients, you'll end up with a polished, professional video that makes buyers stop scrolling. This is one corner you just can't cut.
How long should my video be?
The golden rule is to keep it short and sweet. Viewer attention spans are notoriously short, so you need to make every second count.
Here’s a simple breakdown based on where you'll post it:
- Social Media (Reels, TikTok): Aim for 30-60 seconds. This is the prime length to capture interest and deliver your message before they swipe away.
- MLS and YouTube: You have a little more room here, so 90 seconds to 2 minutes works well. That's plenty of time to give a comprehensive tour without losing the viewer's interest.
Your video's job isn't to show every single corner of the house. It's to create an emotional hook that makes a buyer want to see more. Prioritize a great flow and impactful shots over sheer length.
Can I just use my phone to make these?
Absolutely. You don't need a high-powered desktop computer. Modern editing apps on iOS and Android are incredibly powerful and easy to use. You can import your professional photos, drag and drop them into order, add music, and even apply slick motion effects right from your phone or tablet.
This is a huge plus for busy agents. You can knock out a video tour while waiting for your next appointment or during a quiet moment at the office.
Will the final video actually look good?
Yes, as long as you pay attention to two things: start with high-resolution photos and export your video in at least 1080p. The quality will be more than good enough for any online platform.
Tools like AgentPulse are built to produce sharp, clean videos that look fantastic on everything from a phone to a big monitor. Just make sure you're using the original, full-size image files from your photographer to get the best possible result.
Ready to stop spending hours on video editing and start creating stunning tours in minutes? AgentPulse uses AI to automatically transform your listing photos into cinematic, scroll-stopping videos. Try it today and see how easy it is to elevate your marketing. Learn more at AgentPulse.