
Creating compelling real estate videos comes down to a simple, four-part process: planning your shots, capturing quality footage (yes, even with just your phone), editing it all together, and finally, getting it in front of the right people. Nail this workflow, and you'll have one of the most effective tools for grabbing the attention of serious buyers and closing deals faster.
Why Video Isn't Just an Option Anymore
In this market, video isn't a "nice-to-have"—it's a critical piece of any serious marketing plan. Photos are great for showing what a home looks like, but video lets you show potential buyers what it feels like to actually be there. That’s where the magic happens. You’re not just listing features; you're creating an emotional connection that turns casual browsers into motivated buyers.
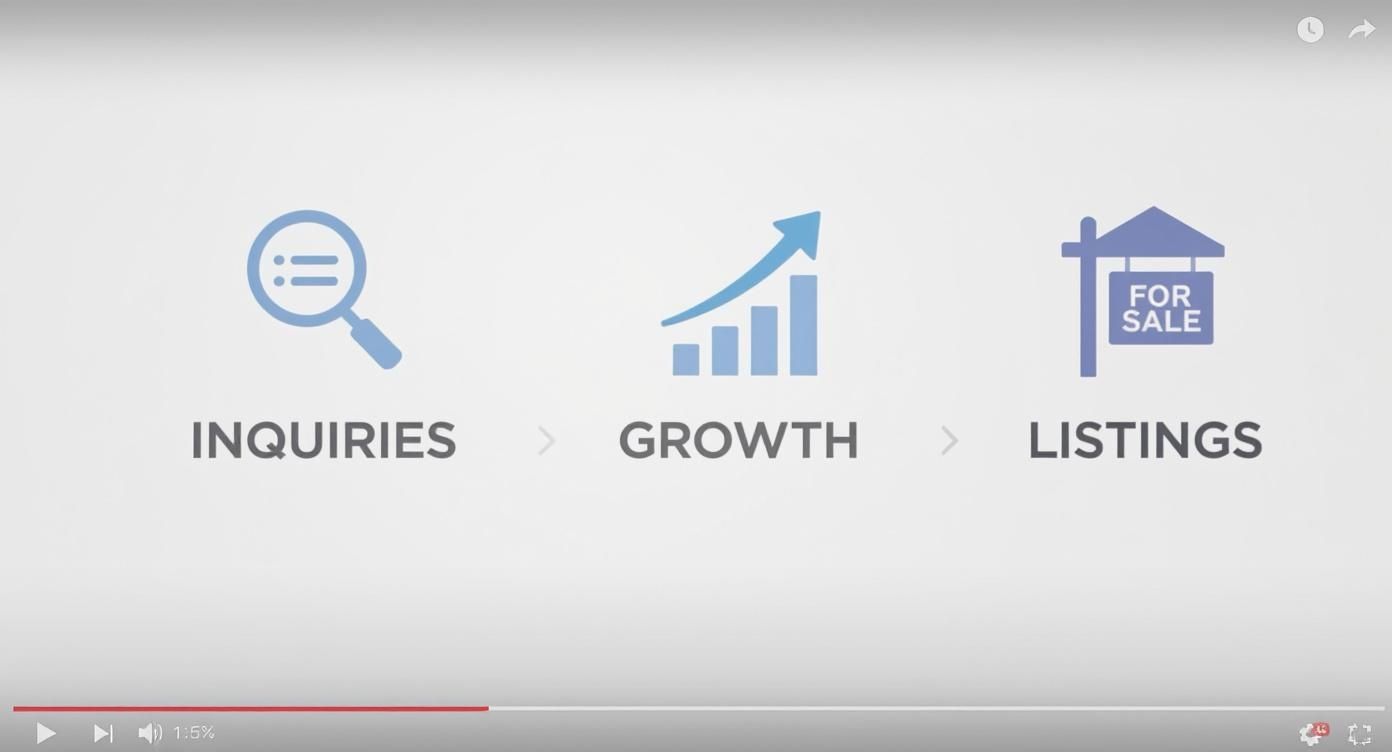
And this isn't just a hunch; the stats back it up in a big way. According to the National Association of Realtors, listings with a video get a whopping 403% more inquiries than listings without one. On top of that, marketers using video see their revenue grow 49% faster than those who don't. The message is crystal clear: video directly translates to business growth.
Build Trust, Win More Listings
Video isn’t just for selling a single property; it’s for selling you. Think about it. Agent intros, neighborhood tours, and quick market updates help you build a personal brand that connects with both buyers and sellers long before they ever meet you. You're not just another agent; you're the local expert they feel like they already know.
Here's how that translates into real-world advantages:
- Boost Seller Confidence: When a homeowner sees you have a portfolio of high-quality videos, they know you're serious about marketing their property. In fact, 73% of homeowners say they are more likely to list with an agent who uses video.
- Keep People Engaged: Let's be honest, people's attention spans are short. Video grabs and holds that attention far better than static images or text, meaning viewers spend more time with your listing.
- Stand Out from the Crowd: In a sea of agents, professional video is a powerful differentiator. It shows you’re committed to modern marketing and providing a premium experience for your clients.
The takeaway is simple. Video is a must. It's a direct investment in your brand, your listings, and your ability to connect with clients where they're already spending their time.
Learning to create great real estate videos is one of the smartest investments you can make in your business. Every tip in this guide is designed to help you produce content that doesn't just look good but actually gets results.
For a more in-depth look, don't miss our complete guide on real estate video marketing and the strategies that are working right now.
Crafting a Compelling Property Video Plan
A great video starts long before you ever press record. It’s born from a smart plan. The real secret that separates a polished, professional video from a shaky, amateur home tour is having a solid pre-production blueprint. This is where you map everything out to make sure your final video feels intentional, connects with buyers, and actually gets them to book a showing.
First things first: what’s the goal? Seriously, what do you want this specific video to do? The answer will shape every single decision you make, from the shots you capture to the music you layer on top.
Are you trying to...
- Get immediate showing requests? A detailed, room-by-room walkthrough is your best bet.
- Create buzz on social media? Think short, punchy, and exciting—a 30-second teaser showcasing the absolute best features.
- Sell a lifestyle? A neighborhood spotlight showing off local parks, coffee shops, and amenities can be incredibly powerful.
- Build your brand? An agent-led tour where you personally guide viewers through the home establishes you as the expert.
Once you’ve nailed down your "why," it's time to figure out the "what"—the story you’re going to tell.
Scripting a Lifestyle, Not Just a Listing
The best real estate videos sell a dream, not just drywall and square footage. Instead of just rattling off facts like "this home has three bedrooms and two baths," your script needs to paint a picture of what life is actually like inside those walls.
Start by zeroing in on the property's most unique selling points. Is it the incredible morning light that floods the kitchen? That cozy fireplace perfect for family game nights? Or the backyard that was practically built for summer barbecues? These are your emotional hooks—focus your story around them.
The most effective video scripts answer the buyer's unspoken questions: "Can I see myself living here? What would my weekends be like? Does this home fit the life I want?"
A few prompts can help get your creative juices flowing:
- "Imagine waking up and enjoying your coffee on this private balcony..."
- "This open-concept living space is perfect for hosting friends and family..."
- "With a home office like this, your commute is just a few steps..."
This simple shift in focus turns a boring inventory of features into an irresistible invitation to a new life. And the numbers back it up: agents who use video get more than 4 times the number of leads compared to those who don’t. Not only that, but video can boost your organic traffic from search engines by a staggering 157%. For a deeper dive into the data, you can check out some great research on how video impacts real estate marketing on photoup.net.
This whole process is about turning interest into action, which ultimately fuels your business by bringing in more inquiries and securing more listings.
Building Your Essential Shot Checklist
Okay, you’ve got your goal and a story to tell. The last piece of the planning puzzle is a detailed shot list. I can't stress this enough: walking into a property with a clear shot checklist is the difference between a chaotic, frustrating shoot and a smooth, efficient one. It guarantees you get everything you need to tell your story without kicking yourself later for missing a crucial angle.
Think of your shot list as your roadmap for the day. It ensures you get a good mix of wide, medium, and close-up shots that will make your final edit feel dynamic and keep viewers hooked. It also forces you to think through the natural flow of the tour, moving logically from one space to the next.
Here’s a great starting point for any property shoot.
Your Essential Property Video Shot Checklist
Use this checklist to ensure you capture every crucial angle for a dynamic and comprehensive property tour.
| Shot Type | Description | Purpose |
|---|---|---|
| Establishing Shot | A wide exterior shot showing the entire property and its surroundings. | Sets the scene and provides context for the home's location and curb appeal. |
| Walk-in Shot | A smooth shot moving from the front door into the main living area. | Creates an immersive feeling, welcoming the viewer into the home as if they are there in person. |
| Room Pan | A slow, steady pan across a room to reveal its size and layout. | Gives a comprehensive view of a space, highlighting its flow and spaciousness. |
| Detail Shot | A close-up of a unique feature, like a custom countertop, a unique light fixture, or high-end appliance. | Showcases quality and craftsmanship, focusing on the small details that make a property stand out. |
| Window View Shot | A shot that focuses on the view from a key window, like the living room or primary bedroom. | Sells the lifestyle beyond the four walls, highlighting a beautiful backyard, city skyline, or natural scenery. |
| Lifestyle Shot | Staged elements like a crackling fireplace, a set dining table, or fresh flowers on a counter. | Helps buyers visualize themselves living in the space and adds a touch of warmth and personality. |
Having this list handy will make your shooting day so much easier and your final video that much better. You’ll thank yourself during the edit, trust me.
Don't Have a Big Budget? No Problem. Here's How to Shoot Amazing Footage.

You absolutely do not need a Hollywood-sized budget to create real estate videos that actually stop the scroll. That powerful little camera in your pocket is more than enough to capture beautiful, professional-looking footage that will grab the attention of serious buyers.
The secret isn’t shelling out for expensive gear; it's about knowing a few key techniques to get the most out of what you already own. It all comes down to dialing in the right settings and prepping the property so it truly shines on camera. When you consider that a basic real estate video can run anywhere from $200 to over $800, learning to do it yourself is a huge win for your bottom line.
Get the Property Ready for Its Close-Up
Before you even think about hitting that record button, the property has to be camera-ready. A little bit of prep work goes a long, long way in making a space feel bright, inviting, and spacious on video.
Your first job is to declutter every single surface. I mean everything. Clear off those personal photos, refrigerator magnets, and any knick-knacks that are lying around. You want to create a clean, neutral canvas so potential buyers can easily picture their own lives there.
Next up, lighting. This is crucial.
- Let the Sun In: Open every single blind and curtain. Natural light is your best friend—it's flattering, and it makes rooms feel bigger and more welcoming.
- Flick the Switches: Turn on all the interior lights. Every lamp, every overhead fixture. This banishes dark corners and creates a warm, consistent glow.
- Check Your Bulbs: Make sure all the lightbulbs in a room are the same color temperature (e.g., all "warm white" or all "daylight"). Mismatched bulbs create a weird, distracting color cast in your video that's hard to fix later.
Think of yourself as a set designer for a few minutes. A simple vase of fresh flowers on the kitchen island or a neatly folded throw blanket can add just the right touch of lifestyle appeal.
A clean, bright, and thoughtfully staged home translates directly into a more appealing video. This initial prep work is non-negotiable and has a bigger impact on your final quality than the camera you use.
Dialing In Your Smartphone Camera Settings
Your phone’s default video settings are made for quick, casual clips, not cinematic property tours. By making a few quick tweaks in your settings menu, you can dramatically level up your footage and give it a much more professional, film-like feel.
First, let's talk resolution. While 4K sounds impressive, 1080p (Full HD) is often the smarter choice for real estate videos. The file sizes are much smaller, which makes them way easier to edit and upload, and the quality is still fantastic for social media, the MLS, and most screens.
Now for frame rate: always shoot at 24 frames per second (fps). This is the gold standard for movies and television, and it gives your footage that smooth, cinematic motion. It feels less like a shaky home video and more like a professional production. Steer clear of 60fps, which can look a little too sharp and sterile for a home tour.
How to Get Smooth, Stable Shots Every Time
Nothing screams "amateur" faster than shaky, jarring footage. The goal is to create smooth, gliding movements that gracefully guide the viewer through the home. A gimbal is a great tool for this, but you can get fantastic results without one by using your own body as a stabilizer.
Here's a simple technique I call the "ninja walk":
- Hold your phone with both hands, keeping your elbows tucked tightly into your sides.
- Bend your knees just a bit to act as shock absorbers.
- Walk slowly and deliberately, heel-to-toe. This minimizes that bouncy, up-and-down motion from your steps.
When you need to pan across a room, don't just move your arms. Plant your feet firmly and rotate your entire torso from the waist. This gives you a much smoother, more controlled movement. These little physical adjustments are the foundation for creating videos that look polished and professional. If you want some great examples, check out some of the best real estate videos for inspiration.
This focus on creating an immersive experience is what really moves the needle. Did you know that virtual tour viewers spend 2-3 times longer on listing pages? Even better, people remember an incredible 95% of a message they see in a video, compared to just 10% when they read it in text. That's a powerful reason to let video tell your property's story.
Editing Your Video for Maximum Impact
https://www.youtube.com/embed/eC8wfWc3dVU
You've done the hard work of filming, and now all your clips are ready on your computer. This is where the real magic happens. Editing is how you take a bunch of raw footage and weave it into a story—one that sells a lifestyle and truly connects with potential buyers.
Don't let the term "post-production" scare you off. You don't need a Hollywood budget or years of training to piece together a fantastic real estate video. With so much user-friendly software out there today, a little know-how is all it takes to create a polished video that gets results.
Choosing Your Editing Software
The right tool for the job really comes down to your own comfort level and how you like to work. The options range from dead-simple mobile apps to incredibly powerful desktop programs.
If you need something quick for social media, especially for content like Instagram Reels or TikToks, mobile apps are a lifesaver.
- CapCut: There's a reason everyone's using it. It's free, intuitive, and packed with tools for trimming, adding text, and finding the perfect trending audio.
- InShot: Another fantastic mobile editor that makes it incredibly easy to arrange your clips, play with speed, and add basic effects without much of a learning curve.
For those projects where you need more granular control and a more polished, professional feel, desktop software is the way to go.
- iMovie (Mac): If you're a Mac user, iMovie is probably already on your computer. It's free, surprisingly capable, and a perfect starting point with a clean, easy-to-understand interface.
- DaVinci Resolve (Mac/PC): This one is a professional-grade editor with an unbelievably powerful free version. It has a bit of a learning curve, for sure, but its color correction and grading tools are second to none in the industry.
A Smarter Workflow: Animate Your Listing Photos
What if you could create a high-energy, dynamic video without shooting a single new frame? This is where some of the new AI-powered tools are really changing the game, offering a massive shortcut for busy agents. Platforms like AgentPulse can take the high-resolution listing photos you already have and animate them into cinematic video clips.
This photo-to-video workflow is a genuine game-changer. The AI is smart enough to analyze each picture, understand the depth and layout of the room, and then create smooth, realistic camera movements—think gentle pans, dolly-ins, and dramatic reveals. You can literally assemble an entire property tour in minutes, not hours.
This approach is perfect for whipping up quick social media teasers, adding a video to your MLS listing, or just making sure every property gets a video presence—even when a full-on video shoot isn't in the budget.
The Art of Pacing and Music Selection
First things first: get your best clips onto the timeline in a logical order. This is your "rough cut." Think about how you’d physically walk a buyer through the home. Start with a great exterior shot, move through the front door, into the living spaces, kitchen, bedrooms, and maybe finish on a high note with the backyard or a killer view.
Pacing is everything. You want the video to feel upbeat and engaging, but not so fast that it's jarring. A good rule of thumb is to keep individual clips pretty short—around 3-5 seconds is usually the sweet spot. This keeps the viewer's eye moving and holds their attention from start to finish.
Music provides the emotional heartbeat for your video. The right track can make a home feel grand, cozy, modern, or serene. I always recommend using royalty-free music sites to find tracks you can legally use. Search for keywords like "uplifting," "inspirational," "chill," or "ambient" to match the vibe of the property. Always play a few options over your footage before you decide on the one.
Adding Polish with Color and Text
A little bit of color correction can make your footage look ten times more professional. You don't need to be a professional colorist; most editing software has simple sliders to boost contrast, saturation, and sharpness. Even a tiny adjustment can make the colors pop and the image look much crisper.
Use text overlays strategically. A clean, simple graphic at the beginning can introduce the property's address, price, or square footage. You can also use text to call out specific selling points as they appear on screen, like "Newly Renovated Kitchen" or "Private Backyard Oasis." Just be sure to keep the font clean and easy to read.
If you're ready to go a bit deeper into post-production, we have a comprehensive guide to real estate video editing that covers more advanced techniques and software tips.
Exporting for Every Platform
Getting your export settings right is absolutely critical. After all that work, the last thing you want is a pixelated, low-quality video. You need to tailor your export settings for every single platform you plan to post on.
Here’s a quick guide I use to get it right every time.
Optimal Video Export Settings by Platform
This quick-reference guide will help you choose the best video export settings for the most common real estate marketing channels, ensuring your video looks sharp and performs well everywhere.
| Platform | Recommended Resolution | Recommended Frame Rate (fps) | Aspect Ratio |
|---|---|---|---|
| MLS & YouTube | 1080p (1920x1080) or 4K | 24 or 30 fps | 16:9 (Horizontal) |
| Instagram Reels & TikTok | 1080p (1080x1920) | 30 or 60 fps | 9:16 (Vertical) |
| Facebook & Instagram Feed | 1080x1080 or 1080x1350 | 24 or 30 fps | 1:1 (Square) or 4:5 (Vertical) |
| Website & Email | 1080p (1920x1080) | 24 or 30 fps | 16:9 (Horizontal) |
By paying attention to these details—from assembling your story and adding polish to exporting correctly—you’ll create videos that not only look incredible but also do their job: capturing buyer attention and getting you more inquiries.
Getting Your Video in Front of Eager Buyers
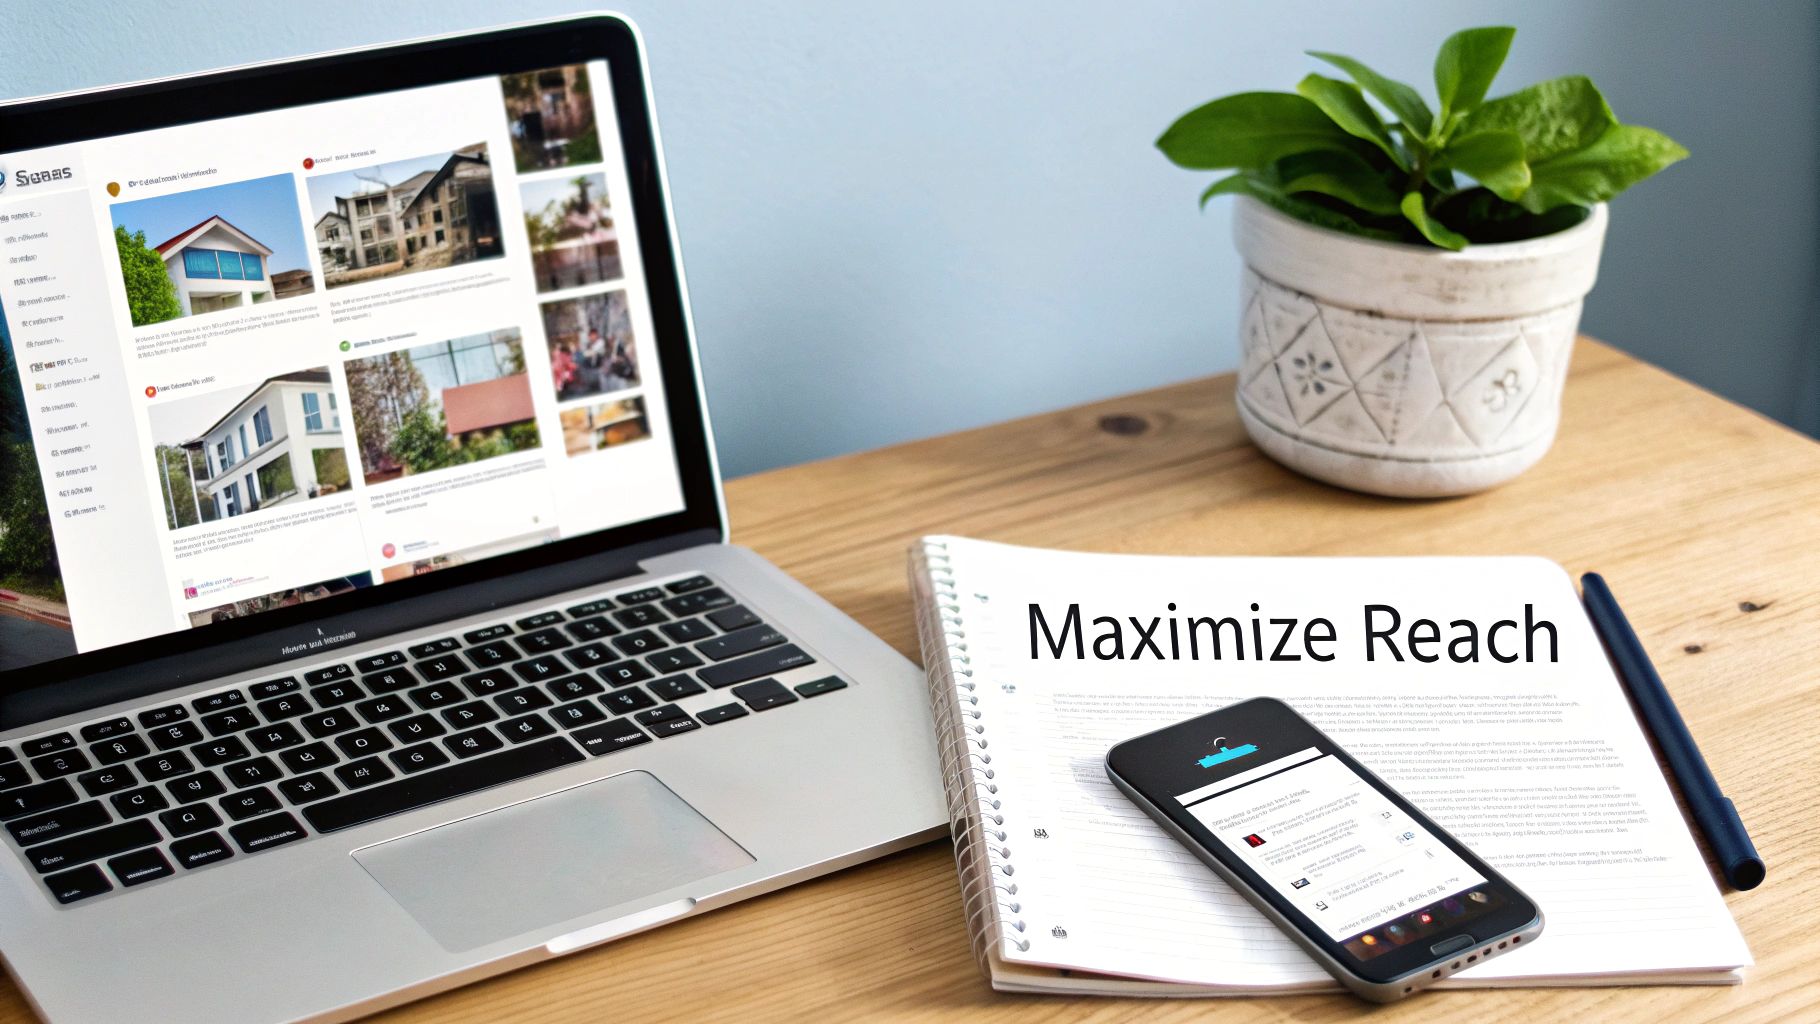
You've done the hard work and created a stunning video. That's a huge win. But here's the reality: a video no one sees doesn't sell a house. The real magic happens when you get that masterpiece in front of the right people.
This isn’t about just tossing a link on your Facebook page and hoping for the best. We need a plan. A smart distribution strategy is what turns your creative effort into actual leads and showing requests. It’s all about putting your video directly in the path of motivated buyers, wherever they're spending their time online.
Start with Search: Make Yourself Discoverable
Before you even think about social media, you have to nail the fundamentals of search. Buyers are on Google and YouTube right now, typing in exactly what they’re looking for. Your job is to make sure your video shows up.
Think like a buyer. What would you search for? Ditch the generic titles like "123 Main Street." Get specific and pack it with keywords.
- A winning title looks like this: "Luxury Waterfront Home for Sale in Miami | 123 Main St | 4 Bed, 3 Bath"
- Why it works: It’s loaded with the property type, location, address, and key features people are actively searching for. Simple, yet powerful.
The description box is your next best friend. Don't just copy-paste the MLS description. Write a compelling summary that tells a story about the home, naturally including those important keywords. I also recommend adding a full transcript of your voiceover and, most critically, a direct link to the listing page on your website.
A well-optimized YouTube video can actually show up in Google's video results. This gives you a second shot at grabbing a spot on that coveted first page for critical keywords, effectively doubling your visibility.
Go Social: Tailor Your Content for Each Platform
One size definitely does not fit all in the world of social media. Posting the same YouTube link everywhere is a recipe for low engagement. To really make an impact, you have to play by each platform's rules.
That means uploading your video natively—directly to the platform—and tweaking it for the format.
- Facebook: This is the spot for your full-length, horizontal video. People are more willing to watch longer content here. Don't forget to write a solid description and tag your brokerage or relevant community pages to expand your reach.
- Instagram Reels & TikTok: Think fast, vertical, and eye-catching. This is where that 30-60 second highlight reel comes in. Use your 9:16 vertical cut, pair it with some trending audio, and you’ve got a scroll-stopper.
- LinkedIn: While you probably won't find your next buyer here, it's a fantastic place to build your professional brand. Sharing your video showcases your marketing chops to your network, which can attract potential sellers who want that same level of service.
Remember, on social media, the first 3 seconds are everything. Make sure your opening shot is absolutely captivating.
Nurture Your Leads with Direct Marketing
Social media is for casting a wide net, but direct channels like your website and email list are where you convert serious interest into action. These people already know you and trust you.
First, embed the full video tour right on the property’s listing page on your website. This makes the listing far more engaging and has the added benefit of keeping people on your site longer—a huge plus for your SEO.
Next, tap into your email list. This is one of your most powerful assets. Craft an email with a can't-miss subject line like, "Video Tour: Your First Look at the New Listing on Elm Street." Inside, use a great-looking thumbnail of the video that links directly to the listing page. You want to drive traffic to your website, not just a YouTube page.
Finally, every single post, email, and description needs a clear call-to-action (CTA). Don't leave people guessing what to do next. Tell them!
Effective CTAs That Actually Work
- "Ready to see it in person? Click here to schedule a private showing."
- "Download the official floor plan and feature sheet now."
- "Have questions? Contact me directly at [Your Phone Number]."
By placing these simple, direct CTAs everywhere you share your video, you create a seamless path from watching to acting. That's how a great video becomes a powerful lead generation machine.
Common Questions About Making Real Estate Videos
Even with a perfect plan in hand, you’re bound to have a few questions pop up when you start making real estate videos. It’s totally normal. Let's walk through some of the most common ones I hear from agents so you can hit record with confidence.
Think of this as fine-tuning your approach. Getting these details right from the start saves a ton of headaches later and ensures your videos actually connect with buyers the way you want them to.
How Long Should a Real Fstate Video Be?
This is the big one, and the honest answer is: it completely depends on where you plan to post it. There’s no magic number that works everywhere. A long, cinematic tour will fall flat on a platform built for quick, bite-sized content.
Here’s a simple cheat sheet for video length:
- MLS & YouTube Walkthroughs: 2-3 minutes. This is your sweet spot for a full property tour. It gives you enough time to guide viewers through the home's key features and layout without them getting bored and clicking away.
- Social Media Teasers: 30-60 seconds. For Instagram, Facebook, or TikTok, you have to hook people immediately. Think high-energy, quick cuts showing off the absolute best parts of the property—that killer kitchen, the backyard oasis, or an incredible view.
- Agent Profile & Branding Videos: 60-90 seconds. When the video is about you, keep it short and punchy. Quickly introduce yourself, show your personality, explain what makes you different, and close with a clear call to action.
The trick is to match your video's depth to what people expect on that platform. A serious buyer browsing on YouTube is prepared to invest more time than someone casually scrolling through Instagram Reels.
Should I Shoot Horizontally or Vertically?
Whether you shoot horizontally (16:9) or vertically (9:16) is another crucial decision that all comes down to where the video will live. If you film in the wrong orientation, you’ll end up with those ugly black bars on the sides or have to crop your shot in a way that ruins the composition.
Here’s a quick guide on when to use each:
- Shoot Horizontally for: YouTube, your website listing pages, the MLS, and most email campaigns. The wide, cinematic feel of a horizontal frame is perfect for capturing the scale and flow of a property.
- Shoot Vertically for: Instagram Reels, TikTok, and Facebook/Instagram Stories. These platforms are designed for a vertical, full-screen experience on a phone. A vertical video feels native to the platform and grabs way more attention because it fills the entire screen.
My Pro Tip: If you have the time, shoot your most important clips in both formats. After you get that perfect horizontal shot of the kitchen, just turn your phone or camera sideways and grab a vertical version. It takes a few extra seconds on-site but saves you from a world of editing pain later.
Do I Really Need to Be on Camera?
This is a huge source of anxiety for many agents, but let me put your mind at ease: no, you do not have to be on camera to make a great real estate video. A beautifully shot home tour with the right music and some clean text on screen can be incredibly effective all on its own. The house should always be the star of the show.
That said, stepping in front of the camera—even just for a quick intro or a sign-off at the end—can add tremendous value. It puts a face to the name and helps you build a genuine connection with potential clients. They feel like a real person is guiding them, not just watching a glorified slideshow.
If you're nervous, just start small. Try recording a simple 15-second intro for your next listing video. You might be surprised by how much it elevates your content and helps build your personal brand.
Ready to create stunning, cinematic videos from your listing photos in just minutes? AgentPulse uses AI to automatically animate your still images into dynamic video tours, eliminating the need for complex editing or expensive shoots. Learn more and try it for free at AgentPulse.